Brownies: always fudgy, never cakey


fullsizeoutput_31ba

Over the course of the last couple of years I’ve made a few different types of homemade brownies. However, they never turned out as well as boxed brownies! They were either too fudgy, too cakey, or didn’t hold up because they were too crumbly, etc.  I had basically given up on homemade brownies.

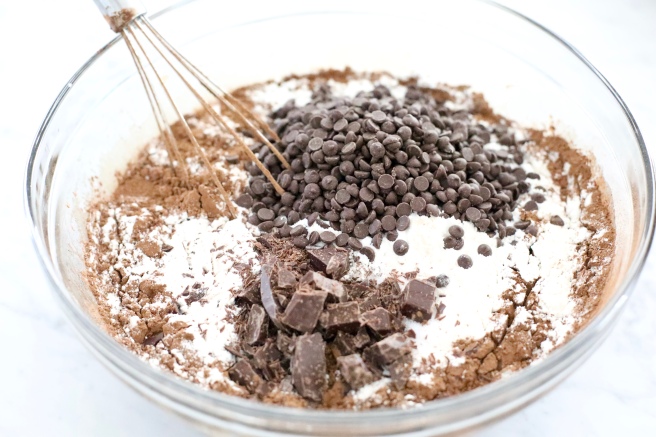
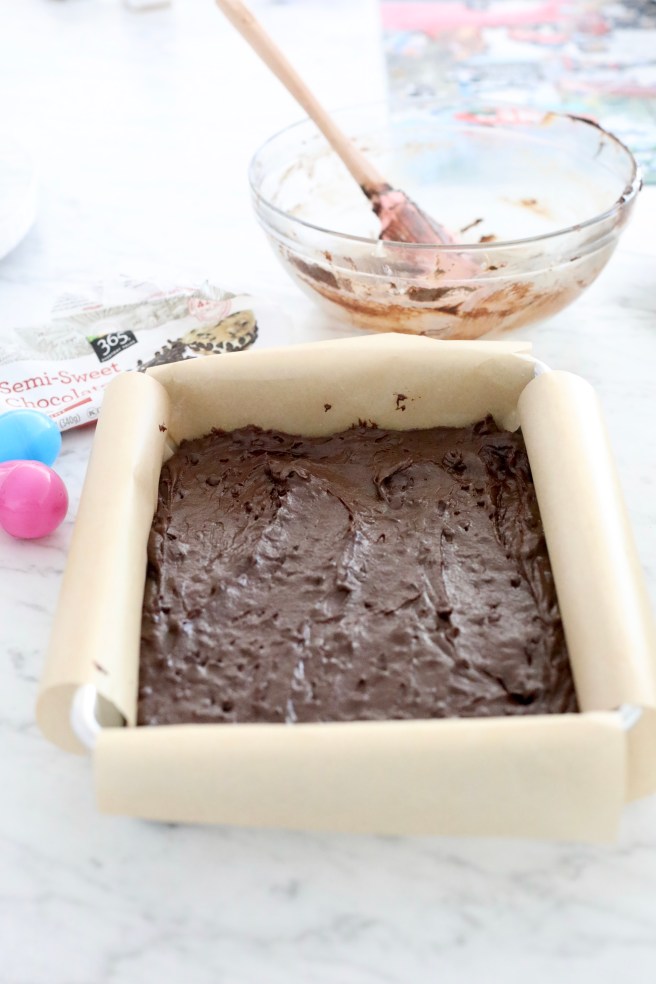
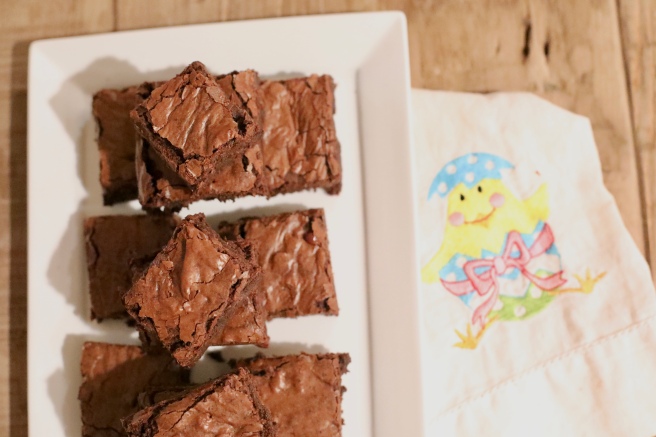
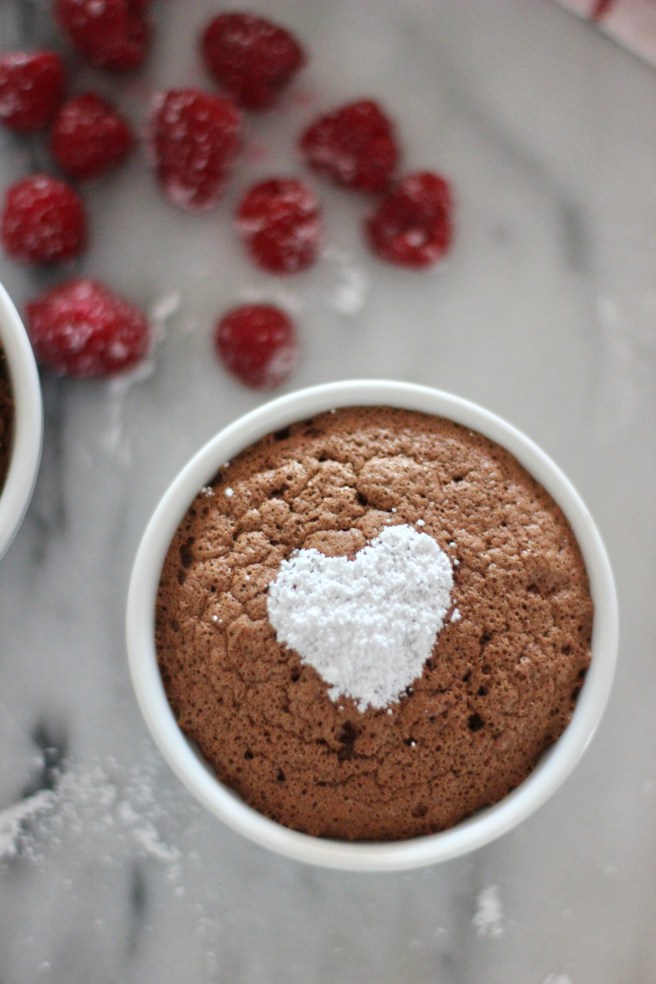
However, when we decided brownies should be our main Easter dessert this year, complete with berries and ice cream, I was determined to make them from scratch.  Que Sally’s Baking Addiction! I must say, she is one of two or three food bloggers whose recipes have never failed me. I quickly decided on these fudgy brownies, because I believe brownies should always be rich and fudgy! Don’t you? Otherwise, make a chocolate cake.

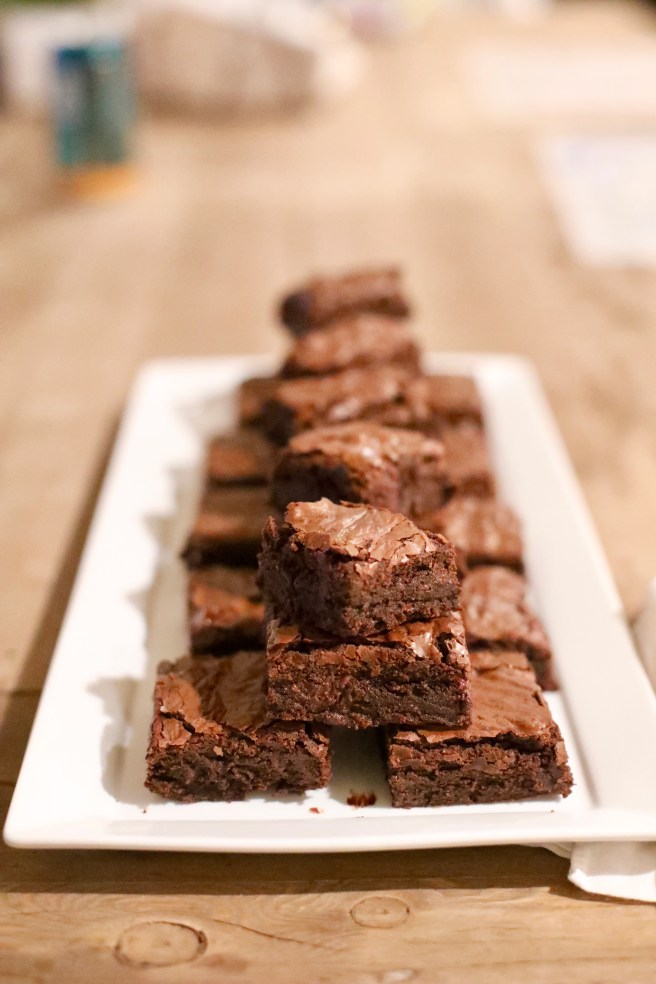
In the weeks since making these, I find myself craving them.  Not boxed brownies, but these specific brownies!  Alas, in my attempt to solve a problem (no more boxed brownies) I have created a new problem because making these, which I now crave over and beyond boxed brownies, does require a little bit more of an effort and mess.  But they are worth every effort! And honesty, the effort to make them is minimal… it’s cleaning the dishes I struggle with the most these days, just ask my husband 😉

fullsizeoutput_31b8fullsizeoutput_31c0fullsizeoutput_31c3

cheers!

Lemon-Blueberry Bread to Fight the Winter Blues

It’s been particularly rainy, cold, and windy here in the Bay Area. Normally this doesn’t bother me, as I love fall and winter and relish in this weather. However, this year I wouldn’t mind speeding up the process a bit as the thought of spring and summer sound exceptionally wonderful.

One night earlier this week, Chris came home and I came undone: I was exhausted.  It is time for summer, sunshine and a long break, I told him. The next morning my mom’s group was meeting and I was determined to bring something: I may not be able to control the weather, if my children are sick, how many more loads of laundry we have left, the TRAFFIC – oh man, the traffic is so terrible around here that it’s soul crushing…. but I can make a pretty great Lemon Blueberry Bread to turn my mood right side up again, and that alone is something worth celebrating.  I pulled out the last few lemons our sweet neighbor gave us a few weeks back at the start of February (whose lemon tree produces 20+ pounds of lemons in the dead of winter!?) and the pack of blueberries I’d randomly bought at the store last weekend and set to work.

Recipe originally from Home Baked Comfort by Kim Laidlaw

INGREDIENTS:

For the Bread:

  • 1 1/2 cups all purpose flour
  • 1 tsp baking powder
  • 1/2 tsp salt
  • 1/2 cup unsalted butter, room temperature
  • 3/4 cup granulated sugar
  • 1 tbsp grated lemon zest
  • 3 large eggs
  • 1/2  cup whole milk
  • 1 tsp vanilla extract
  • 1 cup fresh blueberries

For the Syrup:

  • 3 tbsp fresh lemon juice
  • 3 tbsp granulated sugar

For the Glaze:

  • 1/2 cup confectioner’s sugar
  • 3 tsp fresh lemon juice

INSTRUCTIONS:

  1. Preheat oven to 350. Butter and flour a 9×5 inch loaf pan.
  2. In a bowl, sift the flour, baking powder, and salt. Set aside.
  3. In your stand mixer or large bowl with a hand mixer, beat the butter, granulated sugar, and lemon zest on medium-high speed until light and soft. About 3 minutes.
  4. Add the eggs, one at a time until fully incorporated.
  5. Add the milk and vanilla extract, and mix fully together.
  6. Slowly add the dry ingredients, and stir until just blended. Fold in the blueberries.
  7. Scrape into the loaf pan, and place in oven. Bake for about 50 minutes – I check it around 45 minutes and take it out around 50-51 minutes, when a toothpick inserted in the center comes out clean.
  8. Take it out of the oven, let it cool and then turn onto a plate.
  9. While the bread is in the oven, make the syrup:
    1. In a small saucepan, boil the lemon juice and granulated sugar over medium heat until syrupy.  It will bubble up and get syrupy after about 2-3 minutes. Remove from heat.
    1. Using a wooden skewer (or toothpick), pierce the top, sides, and bottom of the bread.  Brush, or I typically pour, the syrup all over the bread. It’ll ooze into the pierced parts and be amazing, I promise.
  10. Make the glaze: in a small bowl, stir the confectioners’ sugar and lemon juice. Drizzle over the top of the bread once it’s completely cool.

NOTES:

  • The recipe states to toss the blueberries in a small bowl with a teaspoon of flour  before folding into the batter.  The idea is that this prevents the blueberries from sinking to the bottom of the loaf pan while it’s baking. I don’t do this.  I’ve done it a couple of times and found that: (1) it doesn’t serve it’s purpose and (2) it’s more work and clean up.

Cheers!

Raspberry Chocolate Souffles


fullsizeoutput_2599

These delicious little souffles deflated faster than the camera could go “click!” by the time they were ready for their close up.  It was rather sad, but such is life.  Gotta take hold of the reigns before they fly past: life stops for no one and we always have to keep pressing forward. So press forward I did, and here we are with a delicious and surprisingly easy dessert!

Saturday night Chris went to the SMC/Gonzaga game at our alma mater (and also where we got married!) so I made these for the kids and I to enjoy as a consolation.  To be honest, we might have devoured these before dinner.  Oops! On another note, I made a couple of these without raspberries, and I must say they are not nearly as good without the raspberries! The great thing about souffle is that you can prepare the batter and pour  into the ramekins the day before, because it will keep in the fridge overnight.  This saves a lot of time, and breaks up the work quite nicely.

Don’t forget: if you’re going to put a cute, little powdered sugar heart or other design on top make sure your stencil and powdered sugar are ready to go as soon as they come out of the oven – the longer it takes for you to serve these babies the more likely they’ll deflate before they make it to the table!  A lesson learned for next time.  😉

IMG_6076

IMG_6079

fullsizeoutput_2597

INGREDIENTS:

*recipe from William Sonoma’s book Home Baked Comfort

  • 7 tbsp granulated sugar, plus more for dusting the ramekins
  • 6 oz package of raspberries
  • 3 tbsp unsalted butter
  • 6 oz bittersweet chocolate, chopped.  I highly suggest using a high quality chocolate! It makes all the difference for this decadent, chocolate based dessert.
  • 1/2 tsp vanilla extract
  • 5 large eggs, separated plus 2 egg whites
  • pinch of salt – about a 1/4 tsp
  • 1/4 tsp cream of tartar
  • confectioners’ sugar for dustin

INSTRUCTIONS:

  1. Place rack in lower third of the oven and preheat to 375F.
  2. The recipe calls for six 1-cup ramekins, but I found the recipe made 8.  Hence, butter 8 ramekins and lightly dust each with granulated sugar.
  3. In a small bowl toss the raspberries with a tablespoon of the sugar and divide among the ramekins.
  4. In a small saucepan, melt the butter and chocolate over low heat, stirring as you go.  Don’t let the chocolate burn. Remove from heat and stir in the vanilla.
  5. In your mixer, with the whip attachment, beat the egg yolks and 3 tablespoons of the sugar on medium speed until it’s thickened. Fold the chocolate mixture in.
  6. In a large bowl with a hand mixer, beat the egg whites, salt, and cream of tartar on medium-high speed.  When the egg whites are getting fluffy, add the remaining 3 tablespoons of granulated sugar and beat until you have thick, stiff egg white peaks.
  7. Fold the beaten egg whites into the chocolate mixture.  Divide the mixture evenly among the ramekins.
  8. Place on a rimmed baking sheet and bake until they are set and puffed, about 18, but not more than 20 minutes.
  9. Dust with powdered sugar, and enjoy before they fall!

fullsizeoutput_2595fullsizeoutput_259afullsizeoutput_2596

cheers! and Happy Valentine’s Day ♥

SaveSave

M&M Holiday Cookies

IMG_5387

I used to make these all the time, I don’t know why it’s been a good year or so since I last made them.  It’s been a pretty busy holiday season: lots of holiday parties, birthday parties, a quick trip to Hawaii, upcoming holiday travel preparations, and other general life going-on’s, that I realized I needed an easy, reliable, and festive holiday cookie. Cue: The One and Only M&M Holiday Cookie!

I’ve had this recipe for so many years that I don’t even recall where I got it.  However, it’s a tried and true staple in my book, tested time and time again. I make them during Valentine’s Day with the pink, white, reddish colored M&M’s, on St. Patrick’s Day with green M&M’s, and even with your boring, everyday colored M&M’s when needed.  If you scoop the dough out in 1 tablespoon scoops, as I do, you end up with a solid 36 cookies. In our house, that means there’s plenty for us, and even more left over to share with the sweet neighbors who live in our little court with us. Merry Christmas!

IMG_5386IMG_5389IMG_5390

INGREDIENTS:

  • 2 cups plus 2 tblsps all-purpose flour
  • 1/2 tsp baking soda
  • 12 tblsps salted butter, melted
  • 1 cup brown sugar
  • 1/2 white sugar
  • 1 egg and 1 egg yolk, room temperature
  • 2 tsps vanilla extract
  • 1 cup M&M’s, I used Christmas colors on these

INSTRUCTIONS:

Preheat oven to 375 and place rack on upper third of the oven.

  1. Mix the flour and baking soda in a medium bowl and set aside.
  2. In a large bowl, mix the melted butter and all the sugars until they are thoroughly combined.
  3. Add the egg, egg yolk, and vanilla extract. Stir until mixed together.
  4. Gradually add the flour and mix until a dough forms.  You may want to use your hands to bring it all together, because it tends be a little crumbly.
  5. Fold in the M&M’s.
  6. Scoop about a tablespoon of dough out at a time and roll into balls, place them on a baking tray lined with parchment paper.
  7. Bake for about 10 minutes.  I know to take them out when the edges are just barely beginning to turn brown.
  8. Let cool and enjoy!

IMG_5394Notes:

  • This a cookie that I personally prefer slightly undercooked, and that 10 minutes at 375 in the upper third of the oven does the trick!
  • Also, these cookies are so forgiving! You can melt the butter low and slow in a pan, in the microwave on high, in the microwave on low where you still have chunks of whole butter and it will come out the same, every time.

cheers!

IMG_5398

SaveSave

Happy Little Monster Treats

fullsizeoutput_1b7b

It shouldn’t come as a surprise that I am a fan of rice krispie treats.  They’re so easy to make, cut into shapes, turn into all kinds of colors, and kids typically love them.  This particular rice krispie treat first came up on my Facebook feed late one night in September, and I knew I had to make them!

Little did I know, that in total, I would make close to 100 of these little happy monsters!  I’ve come to call them “Happy Little Monsters” because I find they put a smile on most people’s face 😉 We gave them to friends, family, and neighbors.  I made most of them for Jack’s pre school Halloween Party, and wrapped them in these cellophane bags with crinkle paper and a trick or treat tag.  They were pretty cute, and every now and then you could follow a trail of crinkle paper to the child who was eating his or her treat on the go.

It’s been quite fun making these festive treat throughout the month.  Spreading the colored spread, placing the eyeballs, even making the stamped “trick or treat” tags keeps me entertained as I sit next to Chris, while he watches whatever sports game is on tv that particular night after the kids have gone to bed.

fullsizeoutput_1b8a

IMG_4716

INGREDIENTS:

  • 3 tablespoons unsalted butter
  • 2 tablespoons milk
  • 2 teaspoons vanilla extract
  • 1 10oz bag of marshmallows
  • 6 cups of Rice Krispies
  • ChocoMaker Candy Wafers, choice of color
  • Candy eyes

INSTRUCTIONS

Rice Krispie Treats:

  1. In a pan, melt the butter over medium-low heat.  Add milk, vanilla extract and marshmallows. Allow the marshmallows to melt over low heat.  Don’t let the marshmallows burn, keep your heat on low and stir often.
  2. While they melt, prepare a 9×13 inch baking dish with parchment paper along the bottom.
  3. Once the marshmallows are melted, remove from heat and mix in the rice krispies.
  4. Pour the marshmallow/rice krispie mix into the prepared baking dish and spread out in an even layer.
  5. Put them into the refrigerator for 30 minutes to cool and set.

Assembling Monsters:

  1. Cut the rice krispies into desired size.  I roughly cut mine into 2×4 or 2×3 inch pieces.
  2. Melt the ChocoMaker wafers in the microwave, use a silicon spatula to stir.  One treat at a time, use the spatula to help spread the colored chocomaker spread onto half of the rice krispie.
  3. Place on parchment paper and add candy eyes.
  4. Repeat until done!
  5. Put treats in cellophane bags, with crinkle cut paper.  Tie with trick or treat tags!

NOTES:

  • I made my trick or treat tags using a stamp, paper and glue.  So easy, and like I said, keeps me preoccupied next to Chris while he watches sports after the kids have gone to bed.

fullsizeoutput_1b7cfullsizeoutput_1b7eIMG_4764

cheers!