It’s All About the Guac!

fullsizeoutput_28a9

All I need in life is good guacamole and a strong margarita.  Sure, I would miss chocolate, tacos, and coffee, but I don’t think I could survive off just those things.  However, guacamole and margaritas could sustain me forever.

In case you live in a hole, it’s Cinco de Mayo tomorrow. I used to assume this was Mexico’s Independence Day, but according to Wikipedia the date, “commemorate(s) the Mexican Army’s difficult victory over the French Empire at the Battle of Puebla”.  While their Independence from Spain is celebrated September 16th.

For me, I’m grateful it means I get to enjoy some good Mexican food! I was in elementary school – maybe 4th grade – when I first tried Mexican food with one of my best friends that year.  Her mom picked us up after school and took as to Taco Bell a couple of blocks away.  I know, Taco Bell, sounds questionable.  I was mortified at the time: I’d never eaten a taco or burrito, or any of these things on the menu.  I decided I’d order whatever she had and just eat it. She ordered two, I ordered one. After I was done I wished I had ordered two like she had.  It was so good I started asking my mom to take me to Taco Bell.

I suppose that’s how my love for Mexican food started: through positive peer pressure to eat a bean and cheese burrito in the 4th grade.

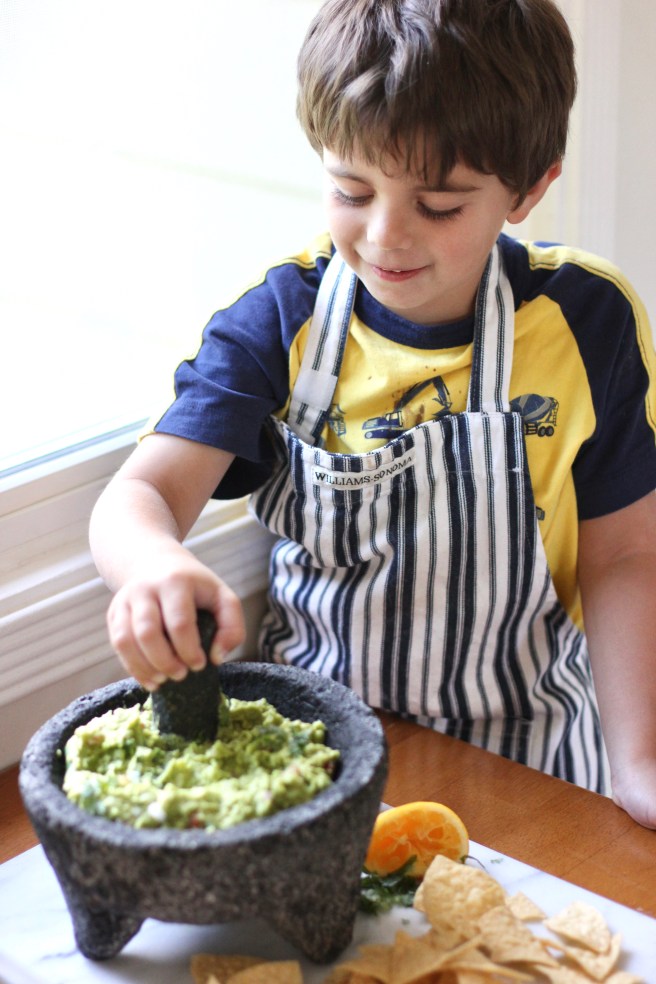
My love for guacamole (and avocados) came a little later in life during my college years.  But it was like meeting my food soul mate if you will.  It was while devouring a bowl of guacamole and chips that it first crossed my mind that I could, maybe, in some crazy crazy way be pregnant with our first over 6 years ago. It’s what I ate the most of while I was pregnant with him and later our daughter, along with all forms of chocolate and avocados in general.  Guac is our jam around here.  Sometimes we just mash some avocado, add a little salt, a splash of lime or lemon or both.  Sometimes we mash it and add a few spoonfuls of our favorite salsa.  Sometimes we make it this way:

fullsizeoutput_28a5

INGREDIENTS:

  • 3 large avocados
  • 1/4 cup of finely diced red onion
  • 1 medium tomato, about half a cup, diced.
  • juice of 1 lemon
  • 1/4 cup of chopped cilantro
  • salt to taste, I used 1/2 teaspoon

INSTRUCTIONS:

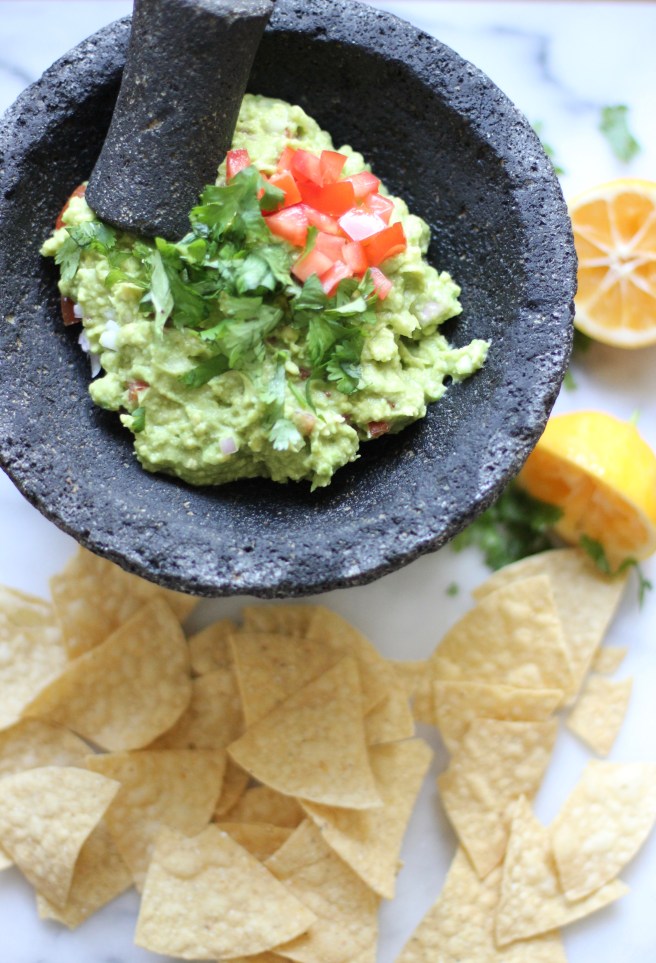
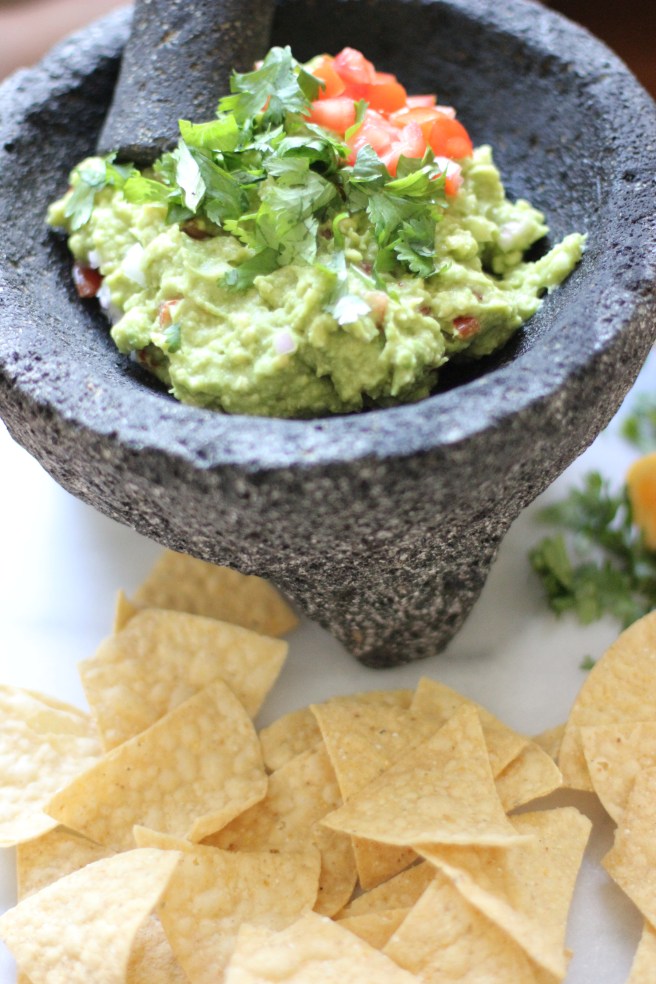
  1. Cut the avocados in half, remove the seed. Scoop out the avocado flesh into a medium sized bowl. Or a molcajete, as I used in the pictures.
  2. Mash with a fork or pestle.  I like to leave a few chunky bits, it doesn’t have to be completely smooth.
  3. Add salt and lemon juice. I prefer to add the lemon juice immediately, because the acid from the lemon juice will keep the green avocado flesh from turning brown too quickly.
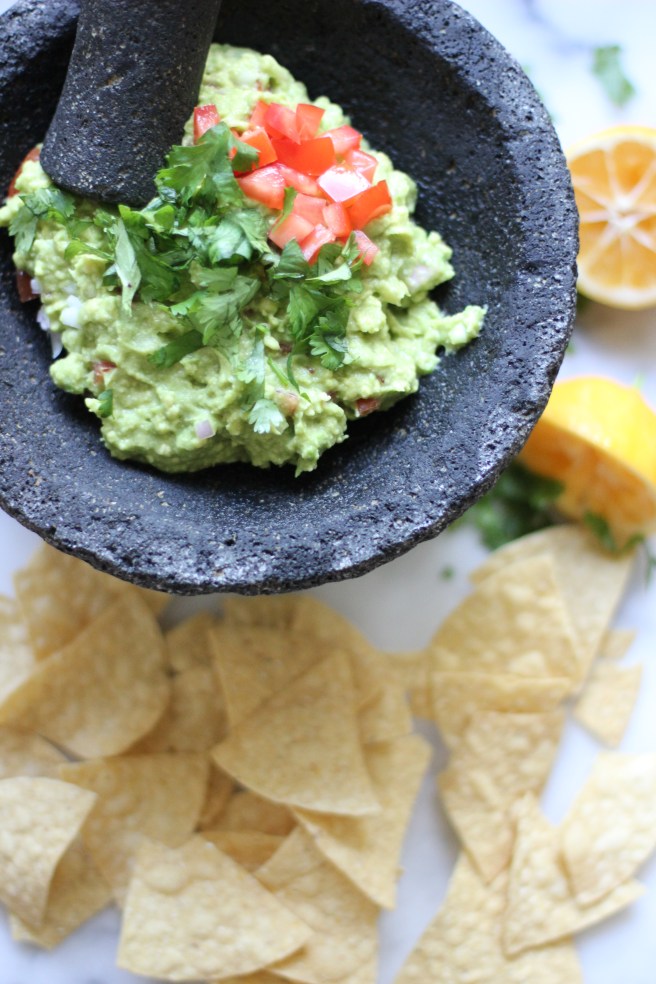
  4. Add the red onion, tomato, and cilantro and stir together until fully mixed.
  5. Enjoy with your favorite chips!

NOTES:

  • Typically, I try not to store my guacamole in the fridge for more than 20 minutes before serving.  However, if you must store it, whether for 20 minutes or an hour, make sure you put plastic wrap right on the guacamole to cover it. If the plastic wrap is touching all the guacamole and pressed onto it, it will prevent air from reaching the guacamole. If air reaches the guacamole it causes oxidation and the guacamole to brown.
  • Guacamole is based on preference, so feel free to add a pinch of lime juice, chili, green onion, more tomato, etc. … in the summertime I love to add a little corn to my guacamole.  Delicious!

IMG_6527

IMG_6522

fullsizeoutput_28aafullsizeoutput_289a

Cheers!

SaveSave

New Years in Argentina!

picture_new

I truly can’t believe it’s already February?!  We’re 1/12 of the way through the year, and I must say it’s been a really fun, adventurous, and exciting year so far. To kick off the new year we celebrated with friends in Patagonia.  Specifically, we stayed with family friends who have a fly fishing lodge in Esquel, Argentina.  It was one of the most beautiful places I’d been in years.

While we were there I kept thinking I was in the movie The Sound of Music, and found myself waiting for everyone to break out into song and dance: “a doe! a deer! a female deer, rain, a drop of golden sun…” while that never happened, I couldn’t stop playing the movie over and over in my head.  Maria, played by Julie Andrews, says in the movie: “the skies were so blue today, and everything was so green, I just had to be a part of it.” This is exactly what it felt like to be there.  Kids climbing trees, picking strawberries and raspberries and cherries right off the trees, running outside all day, riding bikes, swimming, I could go on…

We let the kids go kayaking in the river one afternoon, and I couldn’t help but remember that scene in the movie where the children and Maria are in their canoes heading back home and they all fall in the water while their Father watches –  although my kids never fell in I think these pictures give a glimpse of what I’m talking about! If you couldn’t already tell The Sound of Music is one of my all time favorite films.  😉

After we left our friends’ place, we continued to Villa La Angostura which is closer to Bariloche, also in Patagonia.  We stayed in a gorgeous home turned hotel that I didn’t want to leave, and that I now can’t wait to go back to one day! It was a truly incredible trip that I’m grateful we got to do as a family.

During this trip we didn’t have internet connection of any kind whatsoever for 3 or 4 days straight. I can’t explain how incredibly freeing it was to be forced to disconnect in that way.  We couldn’t check e-mail, there was no “let me Google that!” during dinner conversations…anything. Not even texting.  As a result, since coming home, I spend less time online, less time thinking about e-mail, social media, surfing the web to browse this and that. I find that it allows me to play more, have more fun, and be more present, for lack of a better word.  … things to think about, I suppose.

cheers! and happy belated New Year! 😉

M&M Holiday Cookies

IMG_5387

I used to make these all the time, I don’t know why it’s been a good year or so since I last made them.  It’s been a pretty busy holiday season: lots of holiday parties, birthday parties, a quick trip to Hawaii, upcoming holiday travel preparations, and other general life going-on’s, that I realized I needed an easy, reliable, and festive holiday cookie. Cue: The One and Only M&M Holiday Cookie!

I’ve had this recipe for so many years that I don’t even recall where I got it.  However, it’s a tried and true staple in my book, tested time and time again. I make them during Valentine’s Day with the pink, white, reddish colored M&M’s, on St. Patrick’s Day with green M&M’s, and even with your boring, everyday colored M&M’s when needed.  If you scoop the dough out in 1 tablespoon scoops, as I do, you end up with a solid 36 cookies. In our house, that means there’s plenty for us, and even more left over to share with the sweet neighbors who live in our little court with us. Merry Christmas!

IMG_5386IMG_5389IMG_5390

INGREDIENTS:

  • 2 cups plus 2 tblsps all-purpose flour
  • 1/2 tsp baking soda
  • 12 tblsps salted butter, melted
  • 1 cup brown sugar
  • 1/2 white sugar
  • 1 egg and 1 egg yolk, room temperature
  • 2 tsps vanilla extract
  • 1 cup M&M’s, I used Christmas colors on these

INSTRUCTIONS:

Preheat oven to 375 and place rack on upper third of the oven.

  1. Mix the flour and baking soda in a medium bowl and set aside.
  2. In a large bowl, mix the melted butter and all the sugars until they are thoroughly combined.
  3. Add the egg, egg yolk, and vanilla extract. Stir until mixed together.
  4. Gradually add the flour and mix until a dough forms.  You may want to use your hands to bring it all together, because it tends be a little crumbly.
  5. Fold in the M&M’s.
  6. Scoop about a tablespoon of dough out at a time and roll into balls, place them on a baking tray lined with parchment paper.
  7. Bake for about 10 minutes.  I know to take them out when the edges are just barely beginning to turn brown.
  8. Let cool and enjoy!

IMG_5394Notes:

  • This a cookie that I personally prefer slightly undercooked, and that 10 minutes at 375 in the upper third of the oven does the trick!
  • Also, these cookies are so forgiving! You can melt the butter low and slow in a pan, in the microwave on high, in the microwave on low where you still have chunks of whole butter and it will come out the same, every time.

cheers!

IMG_5398

SaveSave

Happy Little Monster Treats

fullsizeoutput_1b7b

It shouldn’t come as a surprise that I am a fan of rice krispie treats.  They’re so easy to make, cut into shapes, turn into all kinds of colors, and kids typically love them.  This particular rice krispie treat first came up on my Facebook feed late one night in September, and I knew I had to make them!

Little did I know, that in total, I would make close to 100 of these little happy monsters!  I’ve come to call them “Happy Little Monsters” because I find they put a smile on most people’s face 😉 We gave them to friends, family, and neighbors.  I made most of them for Jack’s pre school Halloween Party, and wrapped them in these cellophane bags with crinkle paper and a trick or treat tag.  They were pretty cute, and every now and then you could follow a trail of crinkle paper to the child who was eating his or her treat on the go.

It’s been quite fun making these festive treat throughout the month.  Spreading the colored spread, placing the eyeballs, even making the stamped “trick or treat” tags keeps me entertained as I sit next to Chris, while he watches whatever sports game is on tv that particular night after the kids have gone to bed.

fullsizeoutput_1b8a

IMG_4716

INGREDIENTS:

  • 3 tablespoons unsalted butter
  • 2 tablespoons milk
  • 2 teaspoons vanilla extract
  • 1 10oz bag of marshmallows
  • 6 cups of Rice Krispies
  • ChocoMaker Candy Wafers, choice of color
  • Candy eyes

INSTRUCTIONS

Rice Krispie Treats:

  1. In a pan, melt the butter over medium-low heat.  Add milk, vanilla extract and marshmallows. Allow the marshmallows to melt over low heat.  Don’t let the marshmallows burn, keep your heat on low and stir often.
  2. While they melt, prepare a 9×13 inch baking dish with parchment paper along the bottom.
  3. Once the marshmallows are melted, remove from heat and mix in the rice krispies.
  4. Pour the marshmallow/rice krispie mix into the prepared baking dish and spread out in an even layer.
  5. Put them into the refrigerator for 30 minutes to cool and set.

Assembling Monsters:

  1. Cut the rice krispies into desired size.  I roughly cut mine into 2×4 or 2×3 inch pieces.
  2. Melt the ChocoMaker wafers in the microwave, use a silicon spatula to stir.  One treat at a time, use the spatula to help spread the colored chocomaker spread onto half of the rice krispie.
  3. Place on parchment paper and add candy eyes.
  4. Repeat until done!
  5. Put treats in cellophane bags, with crinkle cut paper.  Tie with trick or treat tags!

NOTES:

  • I made my trick or treat tags using a stamp, paper and glue.  So easy, and like I said, keeps me preoccupied next to Chris while he watches sports after the kids have gone to bed.

fullsizeoutput_1b7cfullsizeoutput_1b7eIMG_4764

cheers!

An Easter Carrot Cake for Beginners

IMG_3251

Easter is always my favorite holiday. Christmas is wonderful and special, and has so much anticipation built up to it that makes for so much fun and excitement. However, because it’s couched between Thanksgiving, New Years, and the general holiday craze, it can be a bit overwhelming with so much activity.  But, not Easter! Instead, Easter has a quiet start with the beginning of Lent on Ash Wednesday and slowly builds up with the coming of Spring, before Easter Sunday.

Chris volunteered me to bring carrot cake for Easter dinner this year.  I was more than happy to oblige because I love any excuse to bake 😉 In our home carrot cake season starts in February when Chris requests it as his birthday cake – it’s his favorite so I’m making it my duty to find (or create) the most perfect carrot cake recipe in the world.  If you have one, feel free to send it my way.  So far, this recipe is as close as we’ve gotten.  I’ve made it a handful of times now and it comes out moist and delicious every time — even when I think “uh oh, this time it’s going to fail me” it doesn’t! It’s a great cake for every spring occasion: bridal showers, baby showers, engagement parties, dinner parties, baptisms etc…

I call it a “beginners” carrot cake because I have actually memorized this recipe – that’s how easy it is! It’s a one bowl recipe.  Mix the oil and sugar, add the eggs, sift in the flour, baking powder, baking soda, salt, nutmeg, cinnamon, add the grated carrots, raisins, pecans – and boom you’re done! …. well, after it spends almost an hour in the oven.  🙂

fullsizeoutput_15e6

INGREDIENTS:                                                                                                                         *Recipe adapted from What’s Gaby Cooking Layered Carrot Cake with Cream Cheese Frosting

  • 2 cups sugar
  • 1 1/2 cups vegetable oil
  • 4 large eggs at room temperature
  • 2 cups all purpose flour
  • 2 teaspoons baking powder
  • 2 teaspoons baking soda
  • 1 teaspoon salt
  • 1 teaspoon ground cinnamon
  • 1 teaspoon ground nutmeg
  • 3 cups finely grated and peeled carrots – I peel them and then place in my mini Cuisinart food processor to grind.  I use my mini food processor more than I ever would have imagined, it’s one of my favorites.
  • 3/4 cup raisins
  • 3/4 cup chopped pecans
  • 4 cups powdered sugar
  • 2 8oz packages of cream cheese at room temperature
  • 1 stick (1/2 cup) unsalted butter at room temperature
  • 4 teaspoons vanilla extract

INSTRUCTIONS:

  1. Preheat oven to 325F.  Grease 2 8inch round cake pans.
  2. Using a stand mixer, or large bowl and hand mixer, beat the sugar and vegetable oil until thoroughly combined.  Add the eggs 1 at a time.  I make sure each egg has been entirely mixed in before adding the next.  It only takes a few seconds for each egg.
  3. Sift in the flour, baking powder, baking soda, salt, cinnamon and nutmeg into the sugar/oil/egg mixture.  I place this strainer over my stand mixer and put all the dry ingredients into the strainer to “sift” through to the sugar/oil/egg mixture.  Stir in the carrots, raisins, and pecans.
  4. Pour the batter into the prepared pans.  Try to divid the batter equally between both pans! Bake about 50-55 minutes until a toothpick inserted into the center of the cake comes out clean.  Let cakes cool completely before frosting.
  5. To make the frosting: use either the wire whip attachment on your stand mixer, or a handheld mixer, and whip together the powdered sugar, cream cheese, butter, and vanilla extract until it is creamy and smooth.
  6. Put one cake layer on a cake plate and spread with frosting.  Then put the other cake on top and spread with frosting.  Enjoy!

IMG_3252

fullsizeoutput_1523

fullsizeoutput_1520fullsizeoutput_1524

Cheers!