One Bowl Blueberry Muffins

IMG_6172

This is a recipe that I am going to commit to memory. It’s that good and that simple! One of my kids has been inhaling blueberries these last couple of weeks, to the point where I just can’t buy enough of them.  However, this week either she slowed down eating them or I bought too many because I found myself with a couple extra packs and somewhat unsure what to do with them. For a while I contemplated blueberry scones — my very very favorite blueberry scones, but that requires dusting the countertop with flour, using super cold butter, etc… etc… and to be frank: too big of a mess; too much of a hassle.

I’ve been pouring over the recipes in Deb Perelman’s book Smitten Kitchen Every Day since I got it around Christmas time and when I turned to these muffins yesterday I knew I had to make them ASAP! No fussy ingredients, one bowl, add the ingredients, mix it up, bake, enjoy… and easy clean up! To be honest, no one likes doing dishes. Especially on a weekend morning. So do yourself a favor and whip these up — you’ll be so happy you did!

IMG_6176

INGREDIENTS:

5 tablespoons unsalted butter

1/2 c. granulated sugar

finely grated zest from half a lemon (I zested a whole, you should too)

3/4 c. sour cream

1 large egg, room temperature

1 1/2 tsps baking powder

1/4 tsp baking soda

1/4 tsp salt

1 1/2 c. all-purpose flour

1 1/2 c. fresh blueberries

3 tablespoons turbinado sugar, for dusting

INSTRUCTIONS:

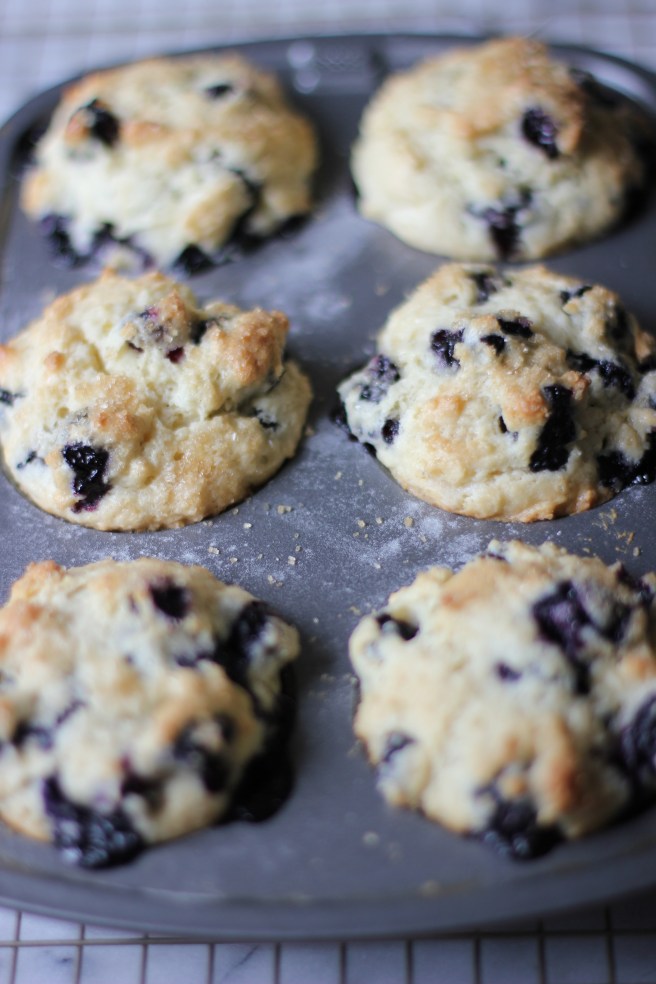
  1. Heat oven to 375. Line a muffin tin with 9 liners, or do as I do, and butter the muffin tin and then dust with flour, the good old fashion way.
  2. In a large, microwave safe bowl, melt the butter – about a minute and a half in the microwave.
  3. Add the sugar, lemon zest, sour cream, egg and whisk until smooth.
  4. Add the baking powder, baking soda, and salt.  Whisk until fully incorporated.
  5. Add the flour and blueberries.  With a wooden spoon or rubber spatula, gently fold in the flour and blueberries to the batter.
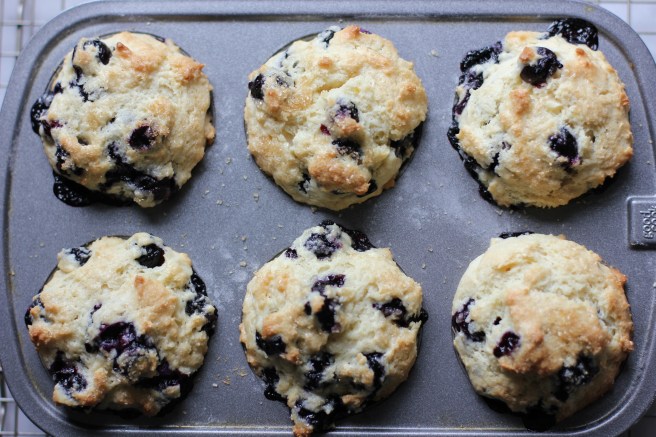
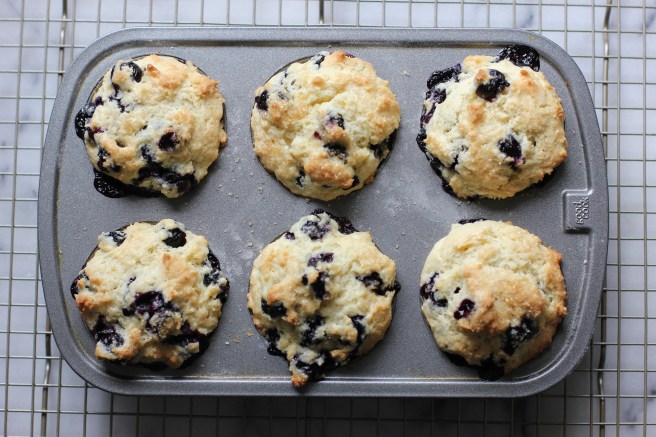
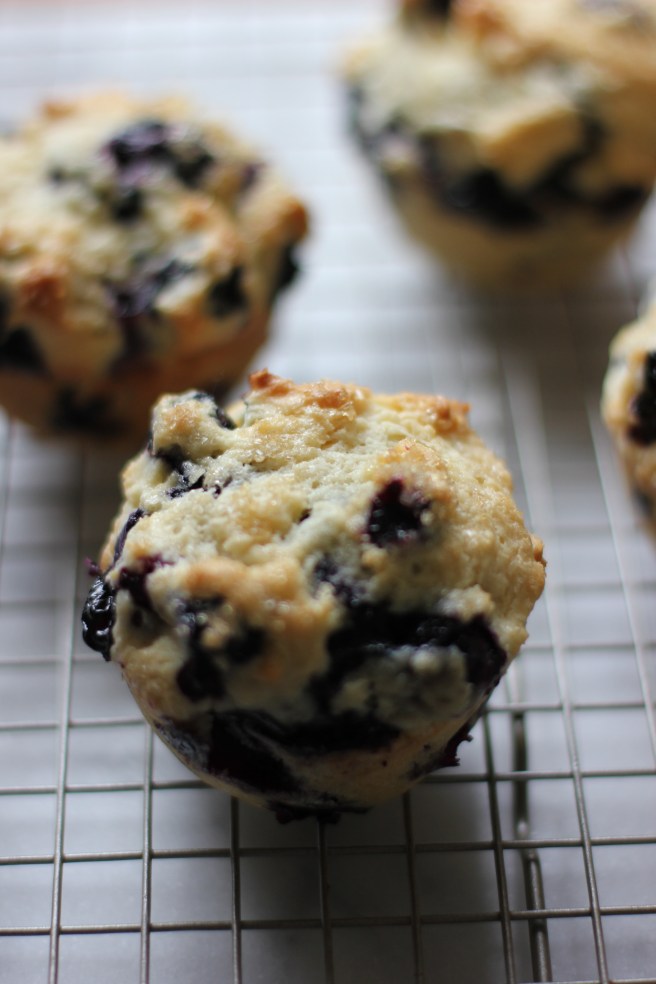
  6. The batter will be thick and smell delicious.  Go ahead, taste a little 😉 Divide the dough into the 9 prepared muffin cups and sprinkle a generous amount of turbinado sugar on top of each muffin.
  7. Bake for 25 minutes, then let cook for 10 minutes and enjoy!!

IMG_6181

IMG_6187

cheers!

New Years in Argentina!

picture_new

I truly can’t believe it’s already February?!  We’re 1/12 of the way through the year, and I must say it’s been a really fun, adventurous, and exciting year so far. To kick off the new year we celebrated with friends in Patagonia.  Specifically, we stayed with family friends who have a fly fishing lodge in Esquel, Argentina.  It was one of the most beautiful places I’d been in years.

While we were there I kept thinking I was in the movie The Sound of Music, and found myself waiting for everyone to break out into song and dance: “a doe! a deer! a female deer, rain, a drop of golden sun…” while that never happened, I couldn’t stop playing the movie over and over in my head.  Maria, played by Julie Andrews, says in the movie: “the skies were so blue today, and everything was so green, I just had to be a part of it.” This is exactly what it felt like to be there.  Kids climbing trees, picking strawberries and raspberries and cherries right off the trees, running outside all day, riding bikes, swimming, I could go on…

We let the kids go kayaking in the river one afternoon, and I couldn’t help but remember that scene in the movie where the children and Maria are in their canoes heading back home and they all fall in the water while their Father watches –  although my kids never fell in I think these pictures give a glimpse of what I’m talking about! If you couldn’t already tell The Sound of Music is one of my all time favorite films.  😉

After we left our friends’ place, we continued to Villa La Angostura which is closer to Bariloche, also in Patagonia.  We stayed in a gorgeous home turned hotel that I didn’t want to leave, and that I now can’t wait to go back to one day! It was a truly incredible trip that I’m grateful we got to do as a family.

During this trip we didn’t have internet connection of any kind whatsoever for 3 or 4 days straight. I can’t explain how incredibly freeing it was to be forced to disconnect in that way.  We couldn’t check e-mail, there was no “let me Google that!” during dinner conversations…anything. Not even texting.  As a result, since coming home, I spend less time online, less time thinking about e-mail, social media, surfing the web to browse this and that. I find that it allows me to play more, have more fun, and be more present, for lack of a better word.  … things to think about, I suppose.

cheers! and happy belated New Year! 😉

M&M Holiday Cookies

IMG_5387

I used to make these all the time, I don’t know why it’s been a good year or so since I last made them.  It’s been a pretty busy holiday season: lots of holiday parties, birthday parties, a quick trip to Hawaii, upcoming holiday travel preparations, and other general life going-on’s, that I realized I needed an easy, reliable, and festive holiday cookie. Cue: The One and Only M&M Holiday Cookie!

I’ve had this recipe for so many years that I don’t even recall where I got it.  However, it’s a tried and true staple in my book, tested time and time again. I make them during Valentine’s Day with the pink, white, reddish colored M&M’s, on St. Patrick’s Day with green M&M’s, and even with your boring, everyday colored M&M’s when needed.  If you scoop the dough out in 1 tablespoon scoops, as I do, you end up with a solid 36 cookies. In our house, that means there’s plenty for us, and even more left over to share with the sweet neighbors who live in our little court with us. Merry Christmas!

IMG_5386IMG_5389IMG_5390

INGREDIENTS:

  • 2 cups plus 2 tblsps all-purpose flour
  • 1/2 tsp baking soda
  • 12 tblsps salted butter, melted
  • 1 cup brown sugar
  • 1/2 white sugar
  • 1 egg and 1 egg yolk, room temperature
  • 2 tsps vanilla extract
  • 1 cup M&M’s, I used Christmas colors on these

INSTRUCTIONS:

Preheat oven to 375 and place rack on upper third of the oven.

  1. Mix the flour and baking soda in a medium bowl and set aside.
  2. In a large bowl, mix the melted butter and all the sugars until they are thoroughly combined.
  3. Add the egg, egg yolk, and vanilla extract. Stir until mixed together.
  4. Gradually add the flour and mix until a dough forms.  You may want to use your hands to bring it all together, because it tends be a little crumbly.
  5. Fold in the M&M’s.
  6. Scoop about a tablespoon of dough out at a time and roll into balls, place them on a baking tray lined with parchment paper.
  7. Bake for about 10 minutes.  I know to take them out when the edges are just barely beginning to turn brown.
  8. Let cool and enjoy!

IMG_5394Notes:

  • This a cookie that I personally prefer slightly undercooked, and that 10 minutes at 375 in the upper third of the oven does the trick!
  • Also, these cookies are so forgiving! You can melt the butter low and slow in a pan, in the microwave on high, in the microwave on low where you still have chunks of whole butter and it will come out the same, every time.

cheers!

IMG_5398

SaveSave

Cooking With Kids, and a Gift Idea

fullsizeoutput_1b17


Since around the time that Jack was 2, maybe earlier, I’ve always loved including my kids in the kitchen.  Whether I’m making a quick sandwich for lunch, rushing to get dinner made, or baking a two layer intricate cake for a birthday, it’s always more fun when little hands are involved. The best part is that both of my kids have always loved helping me in the kitchen.  Who am I kidding, they’ve always loved helping with anything I’m doing: “mama folding laundry?!”  “I got it!” they tell me. “Mama sweeping the floors?!” “I got it!” they tell me.  “Mama doing e-mails?!” “I got it!!” 😉  Perhaps that’s why I never feel like the laundry is completely washed and folded, the floors never thoroughly swept, e-mails left unattended.  However, in the kitchen it’s different.  In the kitchen, there’s always a final product.  It may not perfect, because the frosting may be too thick in the middle from not being spread evenly, dinner might be overly salted, or someone might find an eggshell in their omelette, but there’s always a final product.  Something we all made together in our team effort that we can enjoy together.

Last year, for Isabelle’s first birthday, her Aunt (who is also her Godmother) and Uncle gifted her a few pretty cute gifts, including this incredible Amazing Chef cooking set.  On this particular day, Jack really wanted to make something, but I wasn’t quite in the mood to cook so we opened up this gift, that I’m embarrassed to say had been sitting in the cabinet above the fridge for almost a year, and let the kids have fun! Jack especially loved using the knife to cut up the bananas and Isabelle loved dipping them in the chocolate and sprinkles.

If you ever don’t know what birthday present to get younger children, ages 2-8 or older, I can’t image that this cooking set will ever disappoint.  It’s so fun and gives the kids so much confidence in the kitchen!

IMG_4517

IMG_4520

IMG_4521

IMG_4522

IMG_4529

IMG_4526

Cheers!


SaveSave

SaveSaveSaveSave

SaveSaveSaveSave

SaveSave